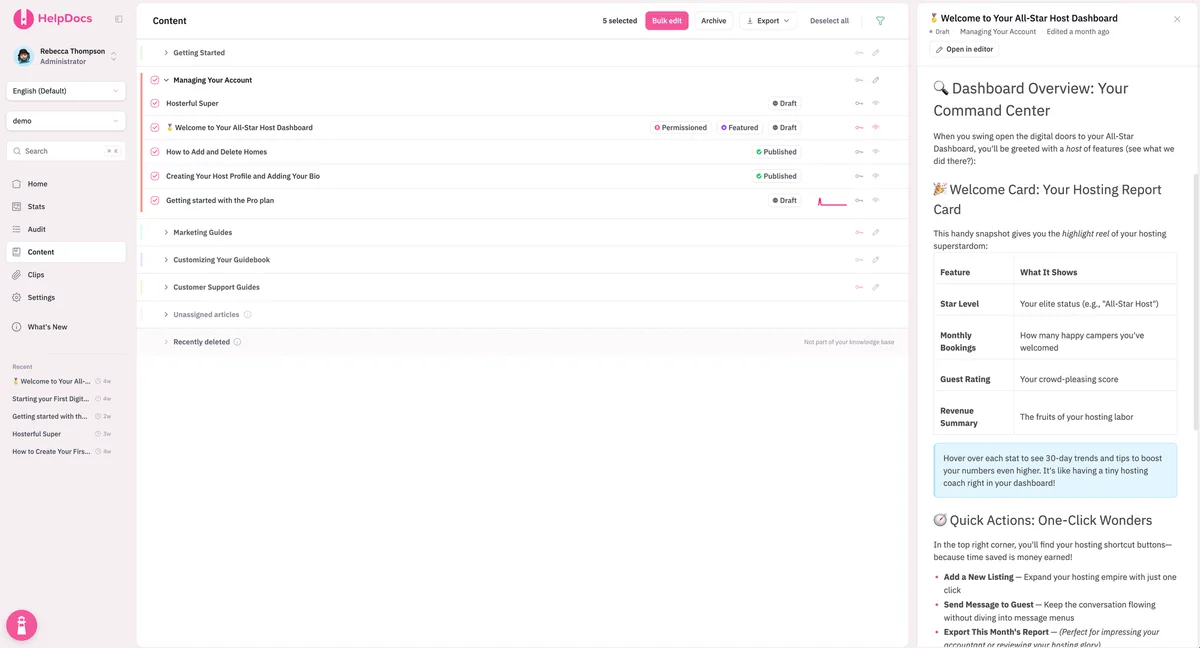
Choosing your top-level categories
Pick the handful of categories your whole help center hangs off.
You’ve decided to build a knowledge base, you’ve got a pile of half-drafted articles, and now you’re staring at the one screen that stops everyone cold. It’s the home page, with its handful of big category tiles, completely blank. Those tiles are your top-level categories, and they carry more weight than any single article you’ll write.
Get them right and people find what they need in two clicks. Get them wrong and even great articles stay buried. This guide is about that top layer specifically: the five-to-eight sections your entire help center hangs off. It’s a focused companion to how to structure a knowledge base, so start there if you want the full blueprint.
The top level matters this much because most customers arrive already trying to help themselves. Harvard Business Review found that 81% of customers attempt to resolve an issue on their own before reaching out to a live rep (Harvard Business Review). Your top-level categories are the first thing that crowd sees, so they’re doing the heavy lifting whether you’ve thought about them or not.
What are top-level categories in a knowledge base?
Top-level categories are the broadest groupings in your knowledge base, the ones shown on the home page and in the main navigation. Everything else, subcategories and individual articles, lives underneath them.
They’re distinct from your full category tree. The complete set of nested groupings is covered in knowledge base categories, and the naming rules that keep the whole system consistent live in knowledge base taxonomy. This article zooms in on just the top rung, because it’s the rung people see first.
How many top-level categories should you have?
Fewer than you think. A good rule of thumb is five to eight top-level categories, enough to cover your product without turning the home page into a wall of tiles.
The instinct is always to add more, because more categories feel more thorough. In practice, a long list forces visitors to read every option before choosing, which is exactly the cognitive tax you’re trying to remove. If you’re pushing past eight, that’s usually a sign two categories should merge, or that some belong a level down as subcategories.
There’s a floor, too. With only two or three top-level categories, each one becomes a catch-all bucket that’s barely more helpful than no categories at all.
How to choose your knowledge base’s main categories
The single biggest shift is this: organize around what customers are trying to do, not around how your company is structured internally. Your customers don’t know (or care) which team owns billing. They just know they want to update their card.
A few principles keep the top level honest:
- Name categories after user goals. “Getting started,” “Billing and plans,” and “Troubleshooting” beat “Onboarding Ops” or “Tier 2 Issues” every time.
- Mirror the customer journey. Roughly order your categories the way people move through your product: sign up, set up, use daily, fix problems, manage the account.
- Keep them mutually exclusive. Each article should have one obvious home. If you’re unsure whether something goes in “Account” or “Billing,” your customers will be unsure too.
- Use the words customers use. Pull labels from your search logs and support tickets, not your internal roadmap. If people search “refund,” don’t hide it under “Financial Adjustments.”
Then pressure-test the set. Take your ten most common support tickets and drop each one into a category without overthinking it. If they slot in cleanly, you’re close. If several could go two places, your top level needs another pass.
Example top-level categories by business type
There’s no universal set, because the right categories depend on what people come to your knowledge base to do. Here’s a starting point for a few common types.
| Business type | Sensible top-level categories |
|---|---|
| SaaS product | Getting started · Account and billing · Features and how-tos · Integrations · Troubleshooting · Security and privacy |
| Ecommerce store | Orders and shipping · Returns and refunds · Payments · Products · Account · Contact us |
| Marketplace / platform | For buyers · For sellers · Payments and payouts · Trust and safety · Getting started |
| Internal IT / employee help center | Hardware · Software and apps · Accounts and access · Network and VPN · Policies · Report an issue |
Treat these as prompts, not gospel. The best set is the one that matches how your specific customers describe their own problems, so borrow the shape and swap the labels for your users’ words.
Common mistakes when choosing top-level categories
Most top-level messes trace back to a handful of habits worth naming.
- Mirroring your org chart. Categories named after teams make sense to you and no one else.
- Too many tiles. A home page with fifteen categories hides the important ones inside the noise.
- Overlapping buckets. When “Account,” “Billing,” and “Payments” all exist, nobody knows where a card update lives.
- Clever over clear. Punny or branded labels feel fun internally and cost you clicks in the wild.
- Set and forget. Your product changes, so revisit the top level once or twice a year and prune anything that’s drifted.
The bottom line
Your top-level categories are the front door to your knowledge base, so give them more thought than any single article. Pick five to eight, name them after what customers are trying to do, keep each one distinct, and test the set against your real ticket volume.
Nail that top layer and everything below it has a sensible place to live. When you’re ready to build out the rest of the tree, our guide on how to structure a knowledge base picks up where this leaves off. And if you’d rather just try it, HelpDocs makes reordering categories a drag-and-drop job rather than a migration project.